 (316) 435-3509
 office@divine-lawns.com
Top 3 Tree Planting Methods for a Happy, Healthy Sapling
Dig a Proper Hole for Your Tree Planting Project
How Deep Should the Hole Be?
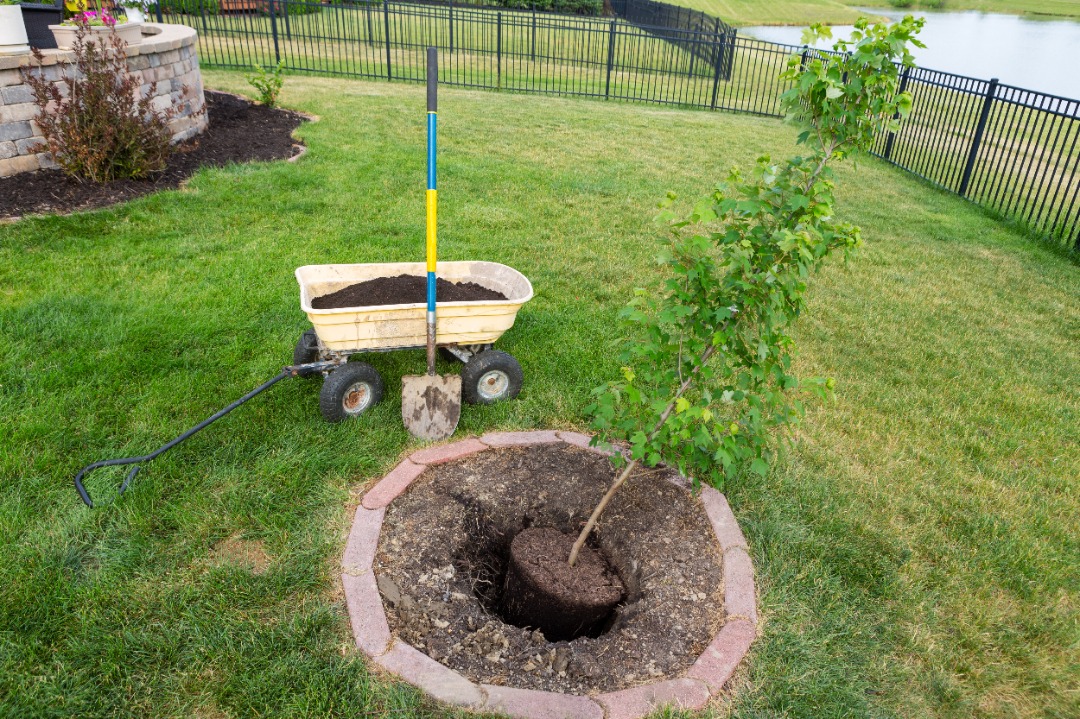
Before you even think about setting your tree into the ground, you want to make sure the hole is dug just right. Many homeowners make the mistake of digging a hole that’s either too shallow or too deep. The best way to dig is to make the hole about two to three times wider than the root ball but only as deep as the root ball itself. This ensures the roots have enough space to grow outward without sinking the tree too deep into the soil. A proper hole sets the stage for strong root growth and a healthy, thriving tree.
When digging, you also want to pay attention to the shape of the hole. Instead of making steep walls, it’s better to have gently sloped sides. This small adjustment makes it easier for the roots to move outward and establish themselves in the surrounding soil. Digging the right way in the beginning can save you from a lot of headaches later. It is a simple but important step that gives your tree-planting project the best possible start.
How to Properly Plant Your Sapling
Once your hole is prepared, carefully place the sapling inside so that the top of the root ball sits slightly above the surrounding ground. It is important not to bury the tree too deep, which can suffocate the roots and prevent proper growth. If it sits too low, take the time to adjust it by adding a little more soil to the bottom of the hole. Taking a few extra minutes here can make a huge difference in your tree’s future health. Setting it right the first time makes everything that comes after much easier.
After you have positioned your sapling, gently begin backfilling the soil around the root ball. Work slowly and make sure the soil is tucked in without being heavily compacted. Lightly pressing the soil as you go helps remove any big air pockets but still allows the roots to move freely. Once the soil is level with the top of the root ball, double-check that the tree is straight. Now, your sapling is ready for the next steps toward becoming a strong addition to your landscaping.
How to Effectively Handle Your Tree for Tree Planting
Tips for Handling the Root Ball
Handling the root ball carefully is one of the most important things you can do during tree planting. The roots inside the ball are delicate and vital to the tree’s ability to establish itself in your yard. Always lift the tree from the root ball instead of grabbing the trunk or branches. This protects the roots from tearing or snapping, which can set the tree back during the critical first weeks. Gentle handling goes a long way in ensuring a successful transition from pot to ground.
If your tree’s root ball is wrapped in burlap, it is okay to leave it on at first while you position the tree. Once your sapling is in place, though, it is important to carefully cut away as much of the burlap as you can. If there is a wire basket, it should be removed or cut back, too. Leaving these materials can restrict root growth and cause long-term problems. Giving the root ballroom to breathe and expand naturally helps the tree adapt faster to its new home.
Efficiently Perform Soil Backfilling Without Issues
When it comes to backfilling, patience is your best friend. Start by using the same soil you dug out, as this helps the tree adjust more easily to its environment. New soils might seem like a good idea, but they can actually create barriers that roots struggle to cross. As you fill the hole, gently firm the soil with your hands or feet, making sure you are not compacting it too tightly. Good soil contact without heavy compaction allows the roots to spread and anchor properly.
It’s smart to backfill a few inches at a time and give a little water between layers. This helps the soil naturally settle around the root ball and reduces the chance of big gaps forming. Air pockets can dry out roots and cause instability, so it is important to take your time here. By focusing on even, gradual filling, you help set your tree up for strong and steady growth. It may feel like a small detail, but it makes a world of difference to your tree-planting success.

Post-Tree Planting Advice for a Healthy, Strong Tree
Don’t Forget to Apply Water!
Right after you finish planting, watering should be your immediate priority. Giving your new tree a deep soak helps settle the soil, remove air pockets, and give the roots a fresh start. The water encourages the roots to reach out into the surrounding soil, promoting faster establishment. Be sure to water slowly so the moisture reaches deep down to the root ball rather than just sitting on the surface. A good soak now means a stronger, healthier tree later.
After the first watering, stick to a consistent watering schedule, especially in the first few months. It is better to water deeply and less frequently than to do light surface watering every day. Deep watering encourages deep root growth, which makes the tree more drought-tolerant over time. Watch the soil moisture and adjust as needed, particularly during dry spells. Good watering habits early on will pay off big when your tree matures.
How Mulching Makes Your Tree Much Better
Adding mulch is a simple yet powerful way to protect your new tree. Mulching helps retain moisture, keeps the soil temperature more stable, and cuts down on weed competition. Organic mulch, like wood chips or shredded bark, works best because it breaks down over time and enriches the soil. Spread the mulch in a wide, even ring around the tree, making sure not to pile it against the trunk. A two- to three-inch layer will do the trick.
Mulching also gives your landscaping a clean and polished look, making your yard feel more finished. Plus, by helping the soil stay moist and cool, you make life easier for the developing roots. Healthy roots mean a healthy tree and healthy trees mean a thriving outdoor space you can enjoy for years. With a little mulching effort upfront, you’re investing in the long-term success of your tree-planting project.

Conclusion
Now that you’re keenly aware of tree planting and what it involves, you may not know if you can do it on your own. While mulching and watering the tree is super easy, the installation itself might require more technical expertise, as well as access to good equipment, especially if you want to install a particularly large tree. We at Divine Lawns specialize in tree services, from planting to trimming, to removal. We’re experts in every stage of tree development, so don’t hesitate to tap into our knowledge to make sure your tree gets what it needs to thrive. We don’t just plan on making your landscapes look great but to be divine in every way. Interested in how we can achieve the high-quality results you want? Contact us today, and we’ll provide you with the help you need regarding tree planting, your landscape, and more!

"*" indicates required fields

Stephanie D.
Nolan A.
Tom F.
Anthony H.